Coinsbit: SaTT registration, purchase and token exchange
In order to provide you with a simpler and more intuitive experience, we have set up a series of tutorials for the different exchange platforms on which SaTT is listed.
You will also find a glossary which will allow you to better understand certain technical terms.
These tutorials are intended to explain the steps to be performed on these platforms:
- Create your account
- – Securing your account through 2FA
– Fill in and validate your KYC - Buy SaTT on the platform
- Deposit SaTT on this platform
- Trade your SaTTs
Important Reminder :
For portfolio managers such as Coinsbit or SaTT, a validated transaction is definitive.
Indeed, there is no possibility of retracing your steps once you validate a transaction.
Always check carefully the address you are copying and pasting. For example, you can write down and check the first 4 characters, then 4 in the middle and finally the last 4.
In this tutorial, whenever something needs your full attention, you will see this sign ⚠️
Disclaimer : Before buying, betting, or trading, make sure you understand what you are doing and carefully consider your investment goals, level of experience, and risk appetites. Only trade money you can afford to lose! We cannot be held responsible for any errors on your part.
Table of Contents
Glossary:
Here is a glossary of technical terms used in this tutorial to help you understand better.
URL (Uniform Resource Locator):
Address of a site or hypertext page on the Internet (e.g. https://satt.atayen.us/) By extension, the URL bar is the search bar of your internet browser.
KYC (Know Your Customer) :
Know Your Customer consists, for a bank or a large company, of verifying the identity and integrity of its customers, in order to prevent corruption, money laundering, tax fraud and financing terrorism. It also helps to ensure the stability of the financial system. The process consists of collecting and analyzing data related to the customer and validating their identities. This process continues throughout the relationship – examination of transactions and customer behavior, assessment of his/her level of risk. .
2FA (Two-Factor Authentication)Two-factor authentication is one of the so-called “strong” security methods. It allows you to bring two separate proofs of identity to log into your account. You can secure access to your account with 2FA.
Limit Order / Market / Stop-Limit :
Please carry out your own research of the different sell orders offered on the platform.
Sources:
- https://www.google.com/search?q=url&rlz=1C5CHFA_enFR917FR917&oq=url&aqs=chrome..69i57j69i60l3.2444j0j7&sourceid=chrome&ie=UTF-8
- https://experiences.microsoft.fr/business-intelligence ia-business / kyc-know-your-customer-lheure-lintelligence-inconnu /
- https://fr.wikipedia.org/wiki/Double_authentication
Step 1: How to create an account?
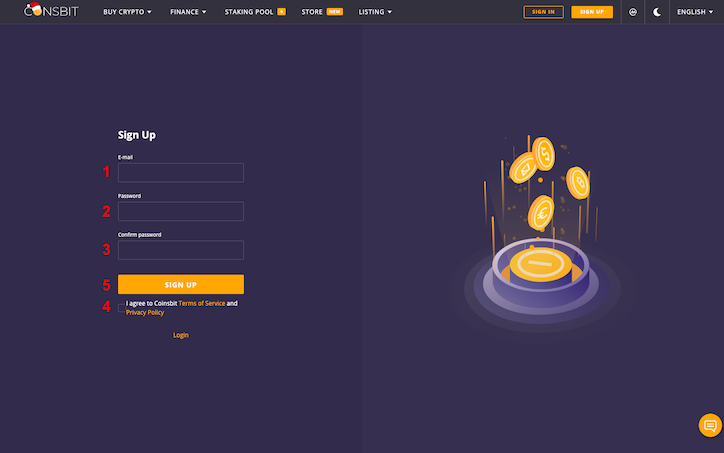
To get started, go to the URL https://coinsbit.io/
Click on [SIGN UP].

Then fill in the different fields:
- Your email
- Your password (please use a secure password)
- Confirm your password
- Read the terms of use and privacy policy of Coinsbit and check the box to accept
- Click on [SIGNUP].

Perform the captcha.
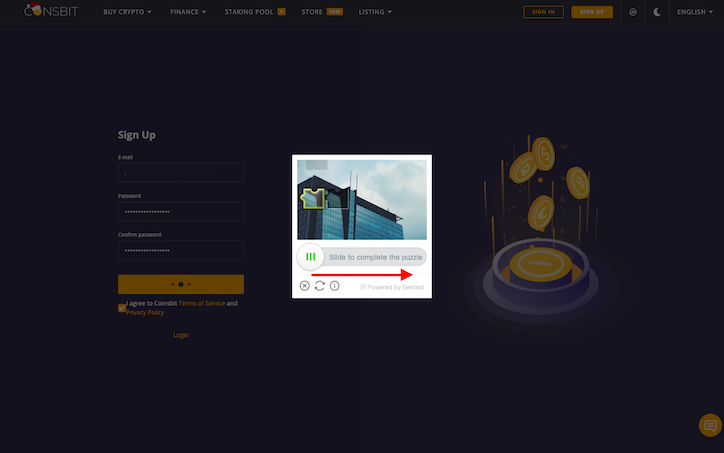
On the next page, Coinsbit asks you to confirm your email address.
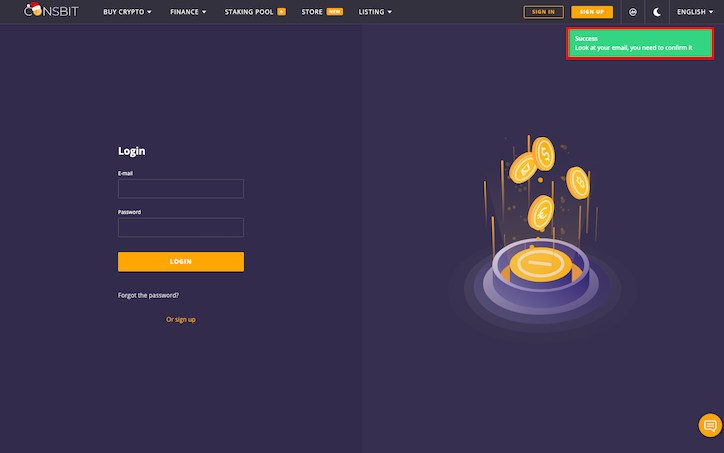
To do this, go to your mailbox, open your email from them, then click on [CONFIRM REGISTRATION].
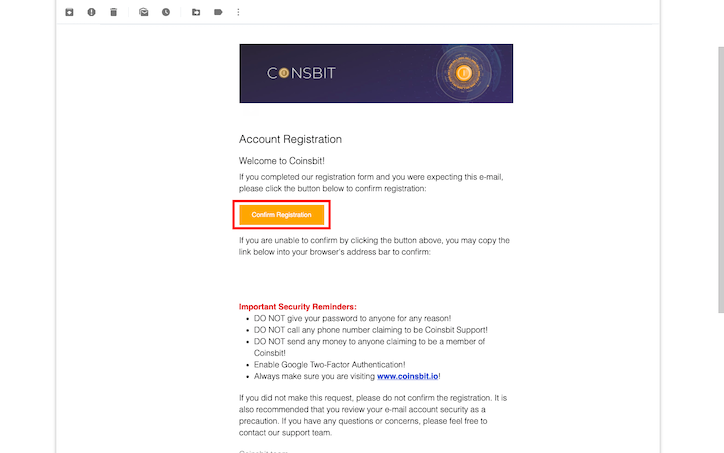
You will be automatically redirected to the Coinsbit site.
While your registration is being confirmed, click on [LOGIN].
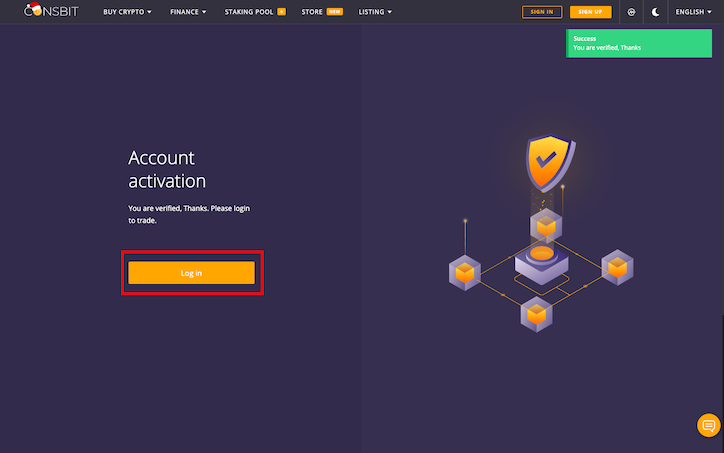
You will be automatically redirected to the Coinsbit login page.
Check that the URL corresponds to https://coinsbit.io/login
Fill in the fields E-mail and Password, then perform the captcha.
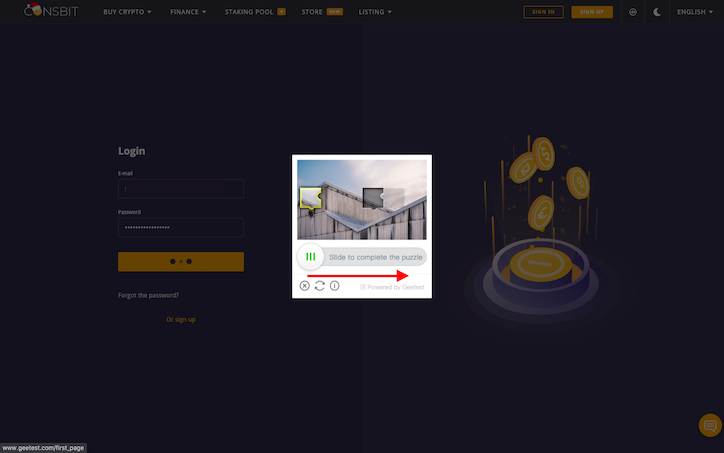
Your account is being created. Let’s move on to secure your account via 2FA as well as complete your KYC information.
Step 2: Secure account with 2FA and complete KYC
KYC
Click on the icon (1) to the right of your browser, then click on [PROFILE] (2).
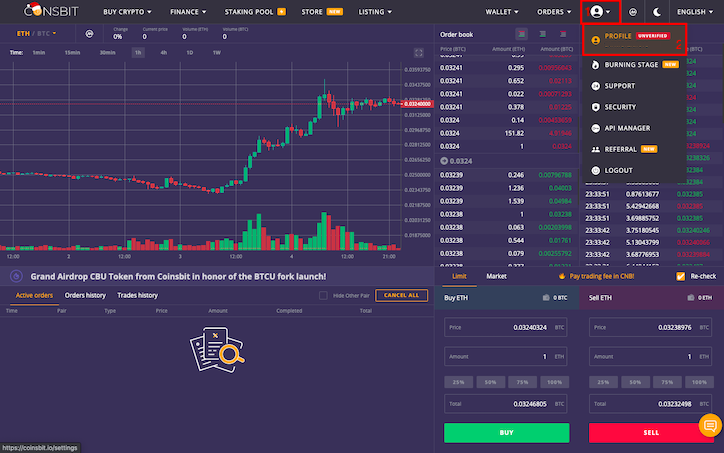
Click on the tab [VERIFICATION].
Fill in the fields in “Verification Process”.
(First Name : First Name / Last Name : Family Name / Gender : Female or Male / Birth Date : Date of Birth)
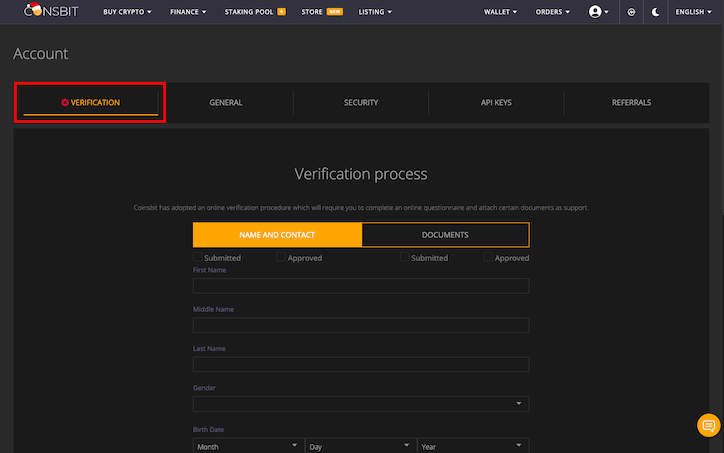
Scroll down to the end of this page to complete all the fields.
(Country : Country / City : Ville / Street Address : Name of the street / House : Number of your accommodation / ZIP : Postal code)
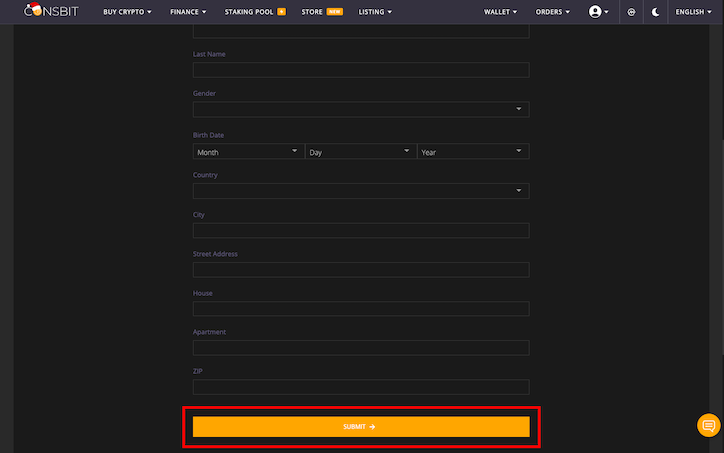
Click on [SUBMIT].
You will be automatically redirected to the second part of this KYC.
Choose the identity document you wish to provide by clicking on the button [CHOOSE FILE] (Passport : Passport / ID Card : Identity card / Drivers license : Driving), and upload it.
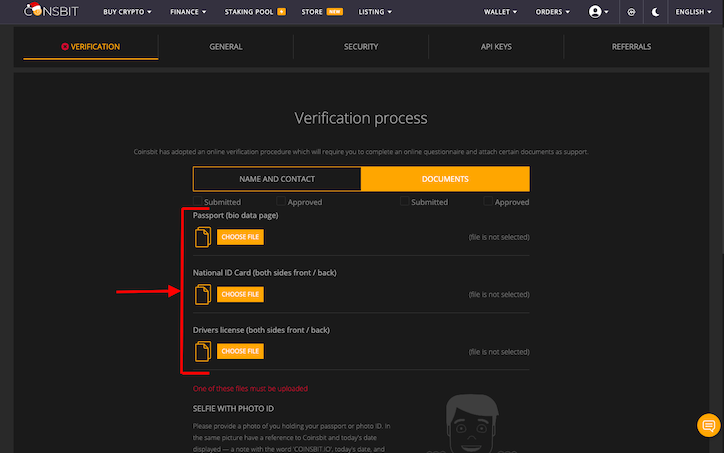
Scroll down to complete the end of this page.
- Please provide a photo of yourself with your ID document, along with a sheet of paper with “COINSBIT.IO”, today’s date, and your signature written on it.
Make sure your face is clearly visible as are all the details on the document. Handwriting must be clearly legible. - Click on [SUBMIT]
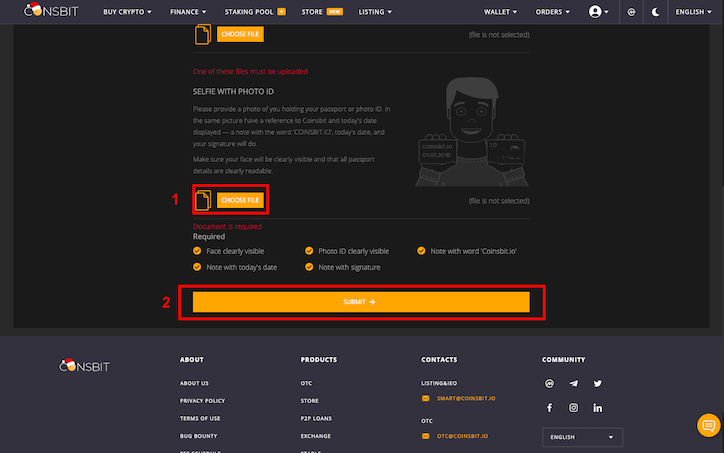
2FA
To secure your account using 2FA, you will need an app such as Google Authenticator to download to your Android or Apple smartphone.
Once this application has been downloaded, scan your QR Code or manually enter the “Recovery Code”.
A 6-digit code will be generated which lasts for 60 seconds. Enter it in the [2FA CODE] field. It will be automatically recognized by the platform.
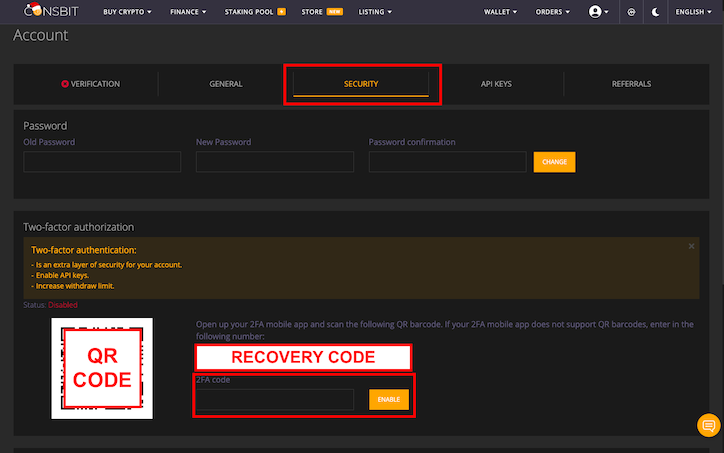
The “2FA” status of your account changes from Disabled to Active.
Congratulations, you have just completed your KYC and created your 2FA!
Step 3: Buy SaTT with USDTCoinsbit
The platform does not currently allow direct purchase of USDT with a bank card.
If you already have USDT on Coinsbit you can join the tutorial in Part Two of this step. Otherwise the first part is made for you!
Don’t have USDT on Coinsbit?
For this, you will have to deposit USDT from another exchange to your Coinsbit wallet (if this is not the case, please buy USDT through your other exchange, then follow the instructions at the end of this first part).
We will explain the procedure below to you:
Click on the Coinsbit logo at the top left.
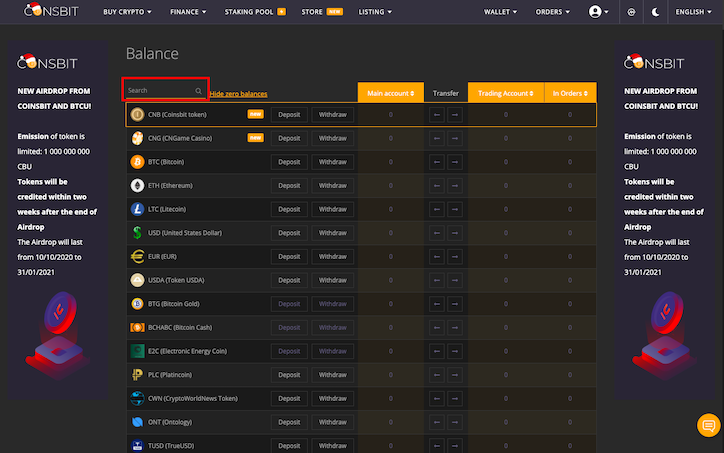
Then click on [WALLET] (Wallet) then [BALANCE].

In the [search] field, insert “USDT”.
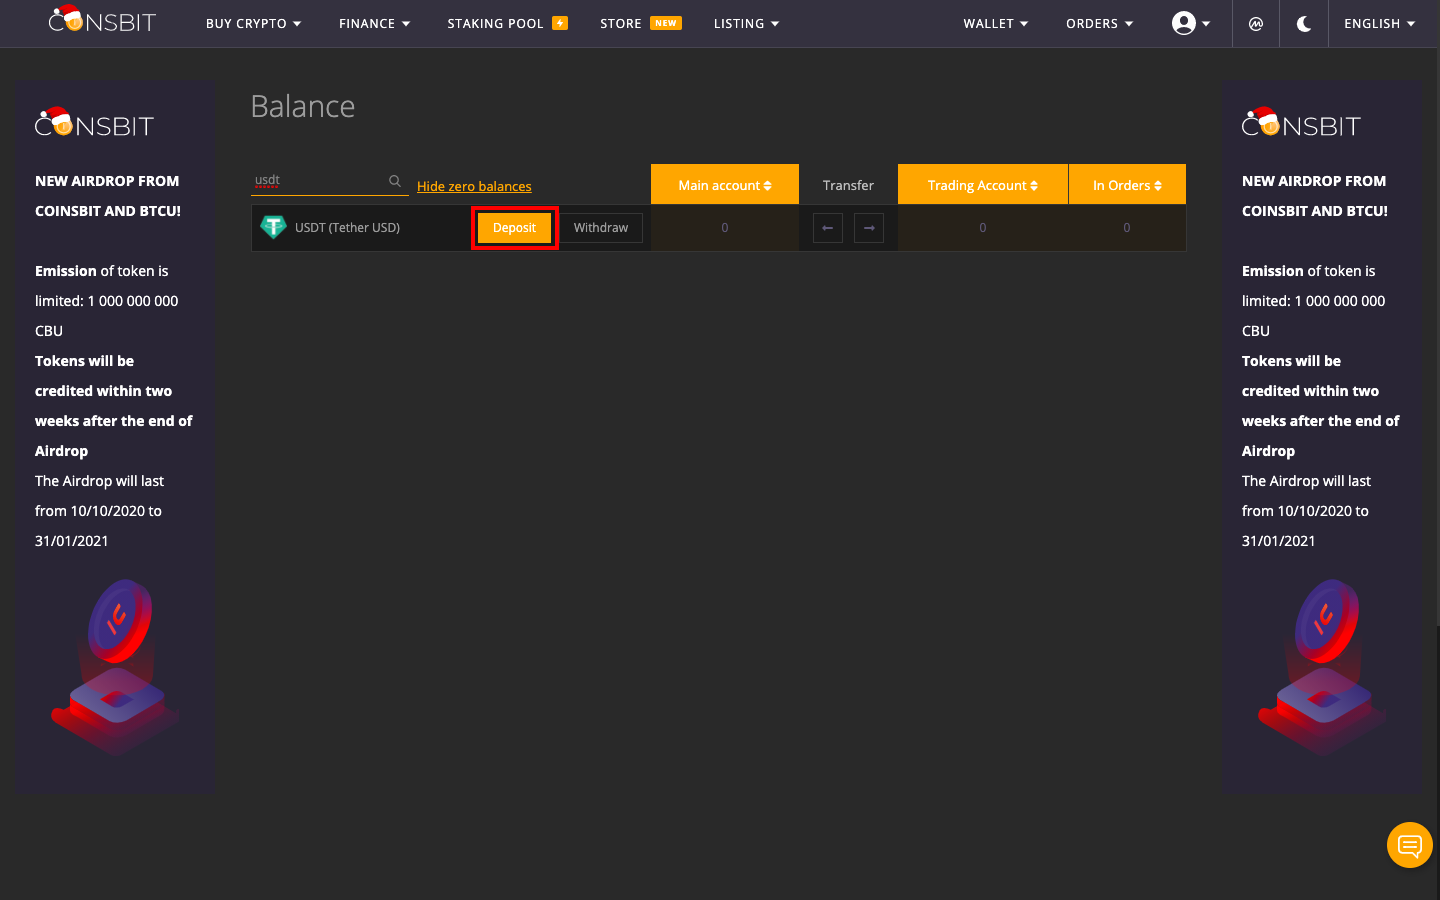
Click on [Deposit] on the “USDT” row.
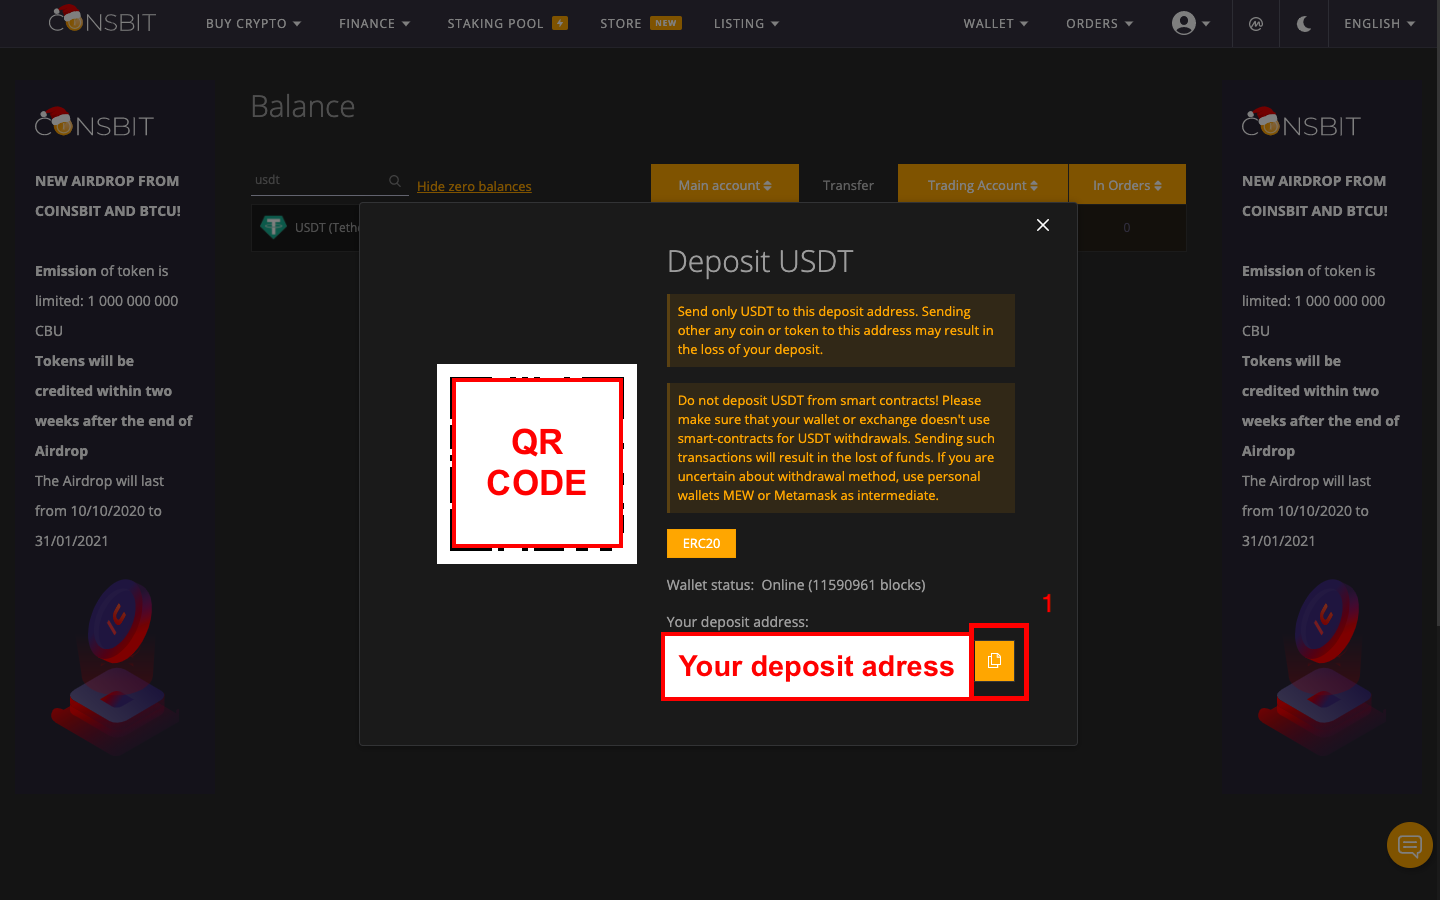
Make sure you deposit ONLY USDT to this address.
⚠️ If the platform from which you want to send your USDT supports QR Codes, go to the [USDT Withdrawal] section of your exchange, flash the QR Code of your Coinsbit deposit address, then proceed with the transfer of all or part of your USDT.
⚠️ If the platform from which you want to send your USDT does not support QR Code, click on the yellow button [COPY] to copy your Coinsbit deposit address, then paste it in the [USDT withdrawal] part of your exchange and proceed to transfer all or part of your USDT.
After validation of the blockchain, your USDT will be available in your “Main account”.
Buy SaTT
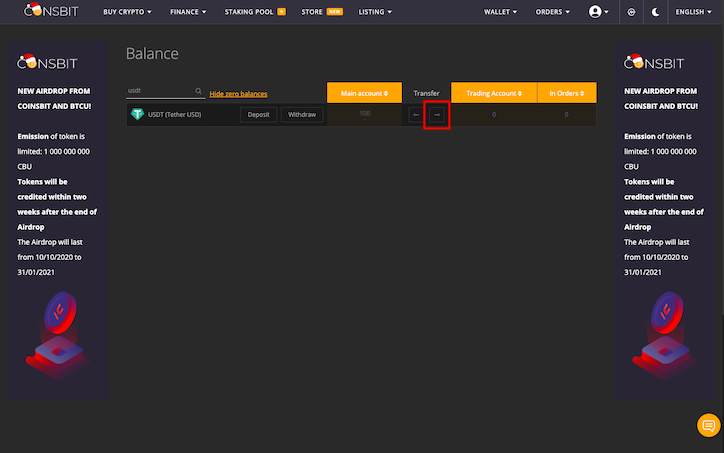
Click on the right arrow to move your USDT from your “Main account” to your “Trading Account”.
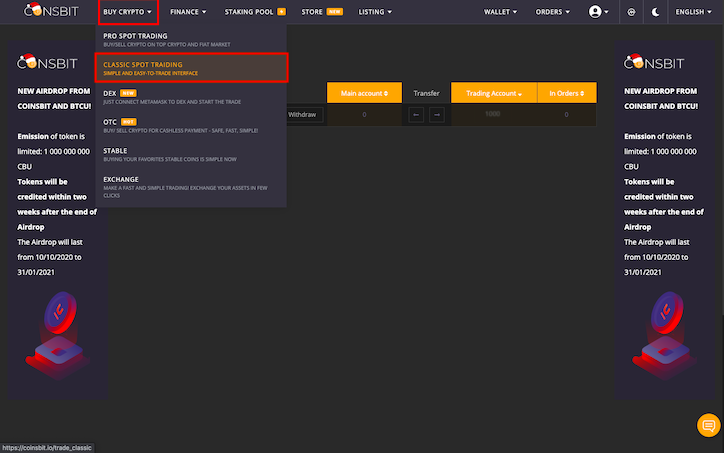
Then click on [BUY CRYPTO] then on [CLASSIC SPOT TRAIDING]
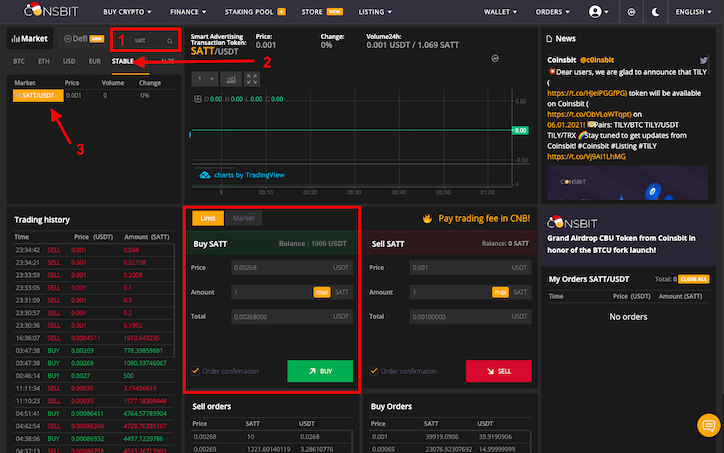
- Enter “SaTT” in the search bar
- Click on “STABLE”
- Click “SATT / USDT”
In the tab [BUY], choose the desired order type. You can sell USDT to buy SATT.
As indicated at the end of the glossary, please carry out your own research of the different types of orders offered by Coinsbit.
Now you have all the cards in your hand to exchange your USDT for SaTT!
Step 4: Deposit your SaTT on Coinsbit
If you already have SaTT, and you want to transfer them to this exchange, here is the procedure to follow.
Click on the Coinsbit logo at the top left.
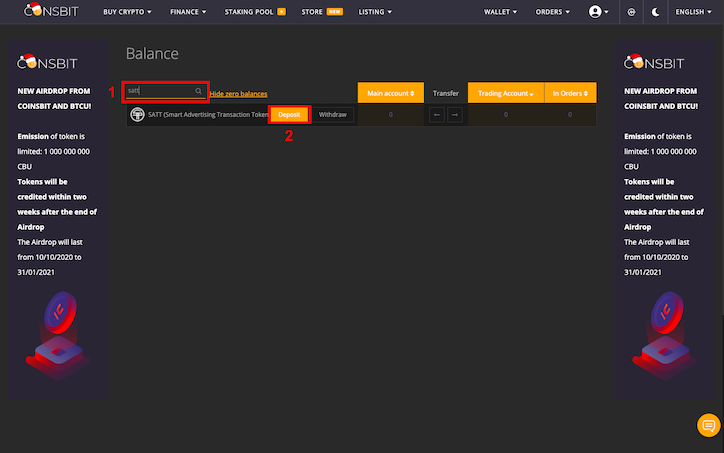
Then click on [WALLET] (1) then on [BALANCE] (2).

In the [search] field, insert “SaTT” (1) and click [Deposit] (2).
Make sure you deposit ONLY SaTT to this address.
⚠️ If the platform from which you want to send your SaTT supports QR Codes, go to the [SaTT withdrawal] section of your exchange, flash the QR Code of your ProBit deposit address, then proceed to the transfer of all or part of your SaTT.
⚠️ If the platform from which you want to send your SaTT does not support QR Codes, click on the yellow button [COPY] (1) to copy your ProBit deposit address.
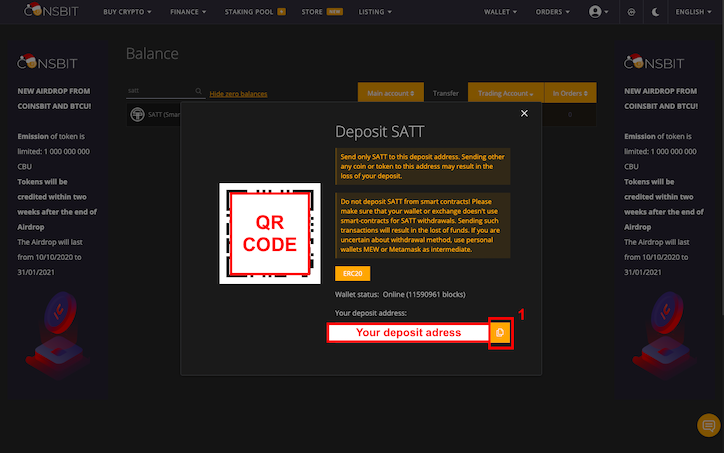
In our example, we will focus on our platform.
Go to your SaTT wallet (https://satt.atayen.us/#/access/signin) or to the platform where your tokens are located.
As SaTT is an ERC20 token, make sure you have ETH on your wallet in order to pay the transaction fees.
- Paste the address you copied to the platform. ⚠️
- Select “SaTT” from the drop-down menu.
- Enter the amount you want to send to the platform. Don’t forget to deduct the costs advertised in the grey box.
- Enter your transaction password (you can re-read our blog post about the transaction password)
- Click on the button [CARRY OUT THE TRANSACTION].
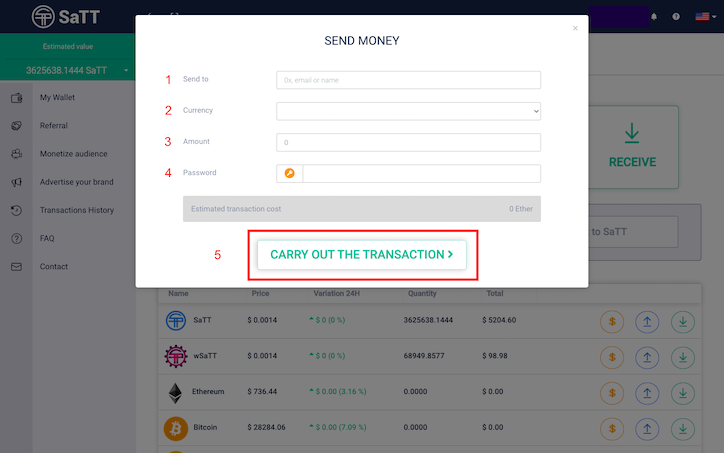
A popup window will appear to confirm your transaction.
After validation of your transaction, your SaTT will be available on Coinsbit.
Step 5: Exchange your SaTT
You can exchange your SaTT on Coinsbit for USDT. You can also exchange your USDT for other cryptocurrencies if you wish.
Go to your “Main account”. Then click on the right arrow to move your SaTT from your “Main account” to your “Trading Account”.
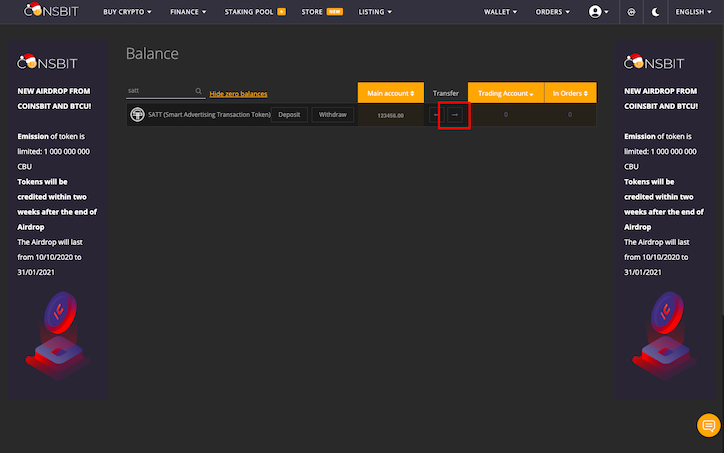
Then click on [BUY CRYPTO], then on [CLASSIC SPOT TRADING].

- Enter “SaTT” in the search bar
- Click on “STABLE”
- Click “SATT / USDT”
In the tab [SELL], choose the desired order type, you can sell USDT to buy SATT.
As indicated at the end of the glossary, please carry out your own research of the different types of orders offered by Coinsbit.
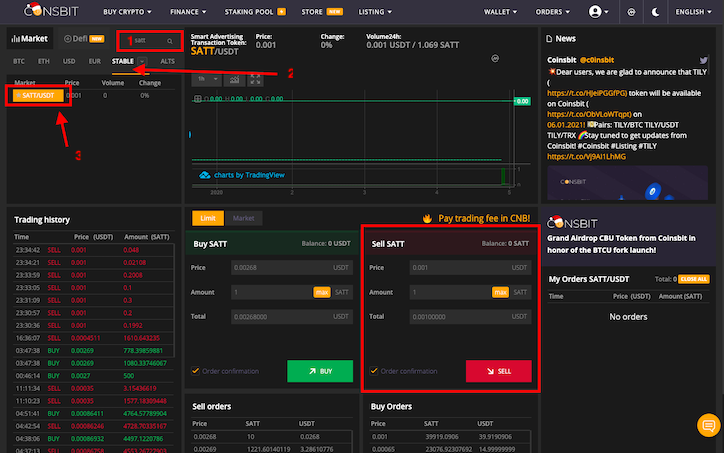
And there you have it, all the cards in your hands to exchange your SaTT for USDT!

